The invite that RSVPs, checks guests in, and finds their photos for them.
Design a multilingual invitation, share it in seconds, watch RSVPs arrive live, and verify every guest at the door — all from one app.
Now available on Google Play.
Built for how Indian weddings and events actually run.
Not a generic e-card — every feature exists because a host or a guest asked for it.
Multilingual invitations
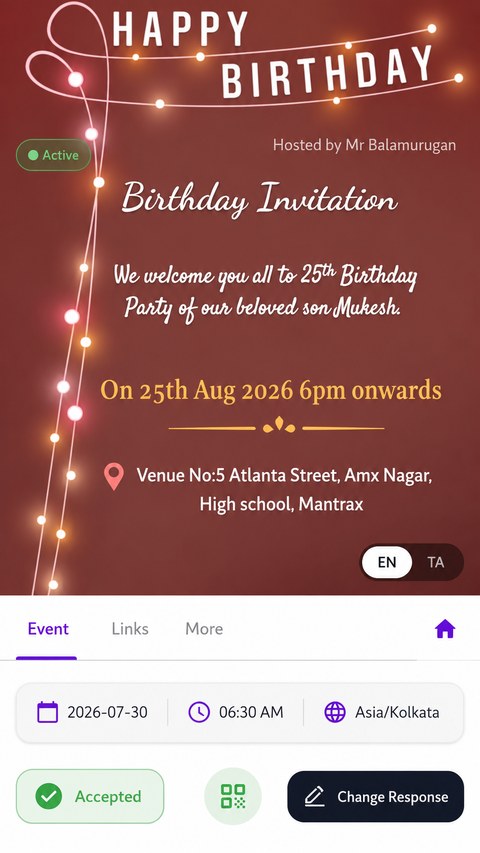
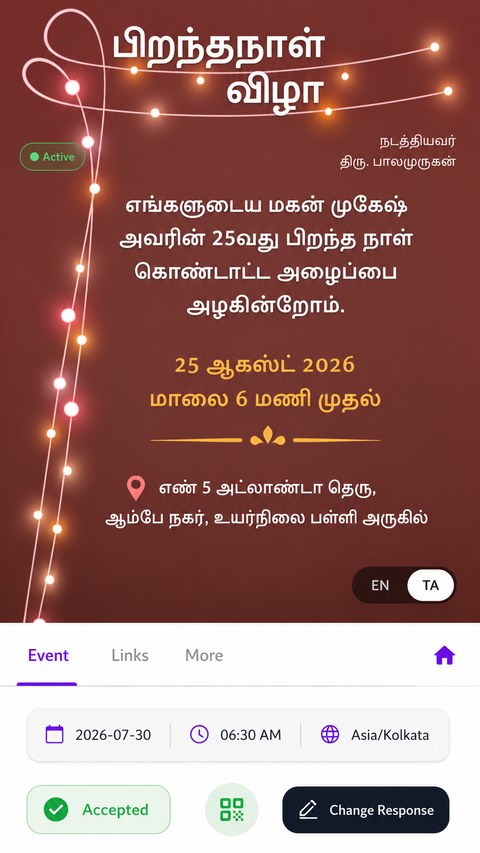
Write your invite text in English, Tamil, or Telugu — each language gets its own layout, fonts, and styling, not a machine translation bolted on.
Share in one tap
Send a link straight from your contacts or hand out a printed QR code. Guests open it, log in once, and their RSVP is on your dashboard instantly.
Live guest insights
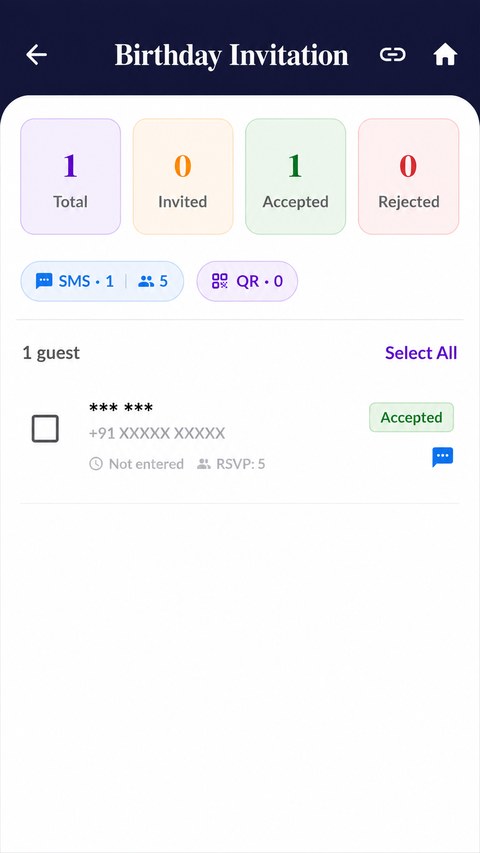
See accepted, declined, and pending counts update in real time, with a veg/non-veg headcount split for catering — no spreadsheet required.
QR entry passes
Every accepted guest gets a personal QR pass. Scan it at the door to check them in, and again at the gift counter — no guest gets missed or double-counted.
Hand off the door to anyone
Generate a one-time link for a family member or coordinator to scan guests from their own phone browser — no app install needed on their end.
Guests find their own photos
Guests opt in with a selfie and are matched to their own photos from the event album automatically — privacy-first, nothing stored beyond their consent.
Go paperless with a printed QR
Turn your physical invite digital by printing its QR code on the card. Guests scan once and carry everything — RSVP, entry pass, directions — on their phone, nothing physical to lose.
One-tap directions
Drop in a Google Maps link and guests get turn-by-turn navigation to the venue with a single tap — no typing an address into a map app.
Add the extra details
Valet parking, caterers, menus, dress code — add as many custom details as your event needs, shown right alongside the invite.
Veg / non-veg headcounts, verified
Collect veg and non-veg counts with every RSVP, and validate them again at the door when QR entry is used — caterers get numbers you can trust.
Keep guests updated
Send a message straight to your guests — a venue change, a reminder, or anything else about the event — and they get it as a push notification or SMS, right when it matters.
Key changes, notified automatically
Change the date, time, or venue — or cancel the event — and every invited or accepted guest gets a push notification automatically. Nothing to send yourself.
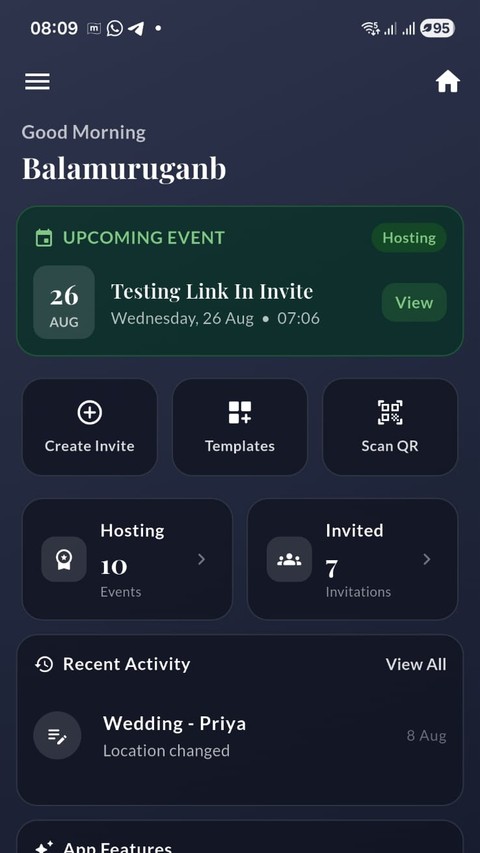
From blank invite to a full event, screen by screen.
Real screenshots go here — swap these placeholders for the actual app views whenever you're ready.
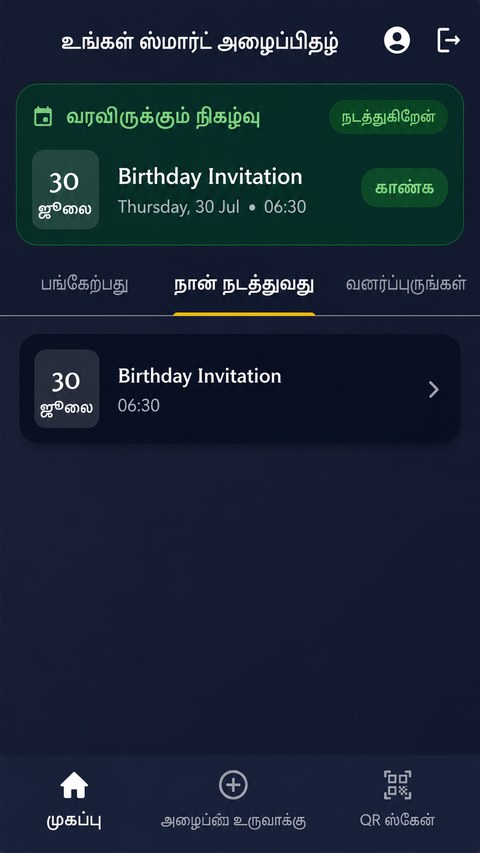
Three steps, start to finish.
Design
Pick a template or upload your own, add your event details, and write your invite text in every language your guests speak.
Share
Send it to your contacts or print the QR code. Every RSVP — accept, decline, headcount — lands on your dashboard the moment it happens.
Celebrate
On the day, scan guests in at the door, track return gifts, and let everyone find their own photos afterward — no follow-up needed.
Step-by-step: how to do everything.
Tap any question to expand it.
How do I create an invite?
- From Home, tap Create Invite in the bottom navigation — or pick a design from the Templates tab first and it'll carry over automatically.
- Go to the Languages tab first and turn on any extra languages you want (Tamil / Telugu). English is always included.
- On the Event tab, fill in your heading (one field per language you selected), status, date, time, and timezone — these are required.
- Use the remaining tabs — Add Text, Links, Guest, Custom, Others — to design the card and add the rest of your event details.
- Tap Save.
How do I upload my own custom template?
Custom template upload is a premium feature — it needs to be switched on for your account first, so get in touch with us to enable it.
- Once it's enabled, open the Template tab while creating or editing an invite.
- Under Your Templates, tap Upload and pick an image from your gallery.
- Your image is automatically resized and compressed to fit the invite's card shape — no need to edit it yourself beforehand.
- Give it a name if you like (you can rename it anytime), and it's saved to Your Templates — ready to reuse on any invite you create.
How do I add a Veg / Non-Veg count?
- While creating or editing the invite, open the Guest tab.
- Turn on Veg / Non-Veg option and save.
- Guests responding to the invite now see separate Veg Count and Non-Veg Count steppers instead of a single headcount.
How do I share the venue's Google Maps link?
- Open Google Maps, find the venue, and copy its share link.
- On the Links tab of your invite, paste it into Location.
- Guests see a location icon on the invite — tapping it opens Maps with directions straight to the venue, no typing needed.
How do I add extra details — valet parking, caterers, menu, etc.?
Use the Custom tab — it gives you up to 5 label + value pairs you can fill in with whatever your event needs, for example:
- Valet Parking — "Available at Gate 2"
- Caterer — "Saravana Bhavan"
- Menu — a note or a link
- Dress Code — "Traditional / Festive"
These show up alongside the rest of the invite for every guest to see.
How do I link multiple events together — like Mehendi, Wedding, and Reception?
If your function runs across several events — a Mehendi, a Wedding, a Reception — create each one as its own invite first, then link them together so inviting a guest to one automatically invites them to all of them.
- Create each event separately (Mehendi, Wedding, Reception, etc.), each with its own date, time, and details.
- Open any one of them for editing and go to the Others tab.
- Select the other events you want linked to it, and save.
Once they're linked:
- Sending an SMS invite or sharing a QR code for any one linked event automatically creates an "Invited" entry for that guest on every other linked event too — you only invite once.
- When a guest accepts any one of the linked events, their acceptance and headcount carry over to the others automatically.
- Declining one event doesn't decline the rest — a guest can still say yes to the Reception even if they can't make the Wedding.
How do I send a message to update my guests?
- Open your invite and tap Insights.
- Select the guests you want to reach — tap individual guests, or use Select All to message everyone at once.
- Type your message once — a venue change, a reminder, or anything else about the event.
- Send it as an SMS, a push notification, or both, so it reaches guests however they'll see it fastest.
How does photo sharing through a link work?
Event Photos is a premium feature. It's turned on by our team, one invite at a time — there's no self-serve toggle for it yet, so a bit of lead time is needed before you plan to start uploading photos.
- Email us at support.yoursmartinvite@gmail.com and tell us which invite you'd like it enabled on — ideally a few days before you plan to set up your photo folder, not the morning of the event.
- We switch it on for that specific invite from our side and reply once it's live. It only applies to the invite you asked about, not every invite on your account.
- Once you hear back that it's enabled, open your invite → Photos and paste in the link to any Google Drive folder — from your phone, PC, or Google Photos, whatever you already use to upload the event's photos.
- The app reads your photos directly from that Drive folder — nothing needs to be re-uploaded into the app itself.
How do guests find their own photos with the opt-in option?
Host side:
- This only works once Event Photos is enabled on your invite and a Drive folder is linked (see above).
- On the invite's Photos screen, you can optionally set a selfie opt-in cutoff date — the last date guests are allowed to opt in. Leave it blank for no cutoff.
- After guests have opted in, tap Process Photos. You can do this as many times as you like — each tap picks up any guests who opted in since the last one.
Guest side:
- The guest opens the invite and taps Find My Photos.
- They take a selfie once to opt in and confirm consent. The selfie itself is never stored — it's only used to find a match, and only for this one event.
- Once the host processes photos, matching photos appear automatically for that guest — no need to submit another selfie.
How do I change my app language?
- On the Home screen, tap the profile icon in the top bar.
- Open Edit Profile.
- Change Preferred Language to English, Tamil, or Telugu.
- Save — the app's menus, buttons, and messages switch to that language immediately.
How do I create an invite in multiple languages?
- On the Languages tab, turn on Tamil and/or Telugu alongside English.
- On the Event tab, a separate heading field appears for each language you turned on — fill in each one in its own language.
- Use the Add Text tab to design each language's card on its own — position, font, and size are independent per language, so a Tamil layout doesn't have to match the English one.
- Save once, and every language is part of the same invite.